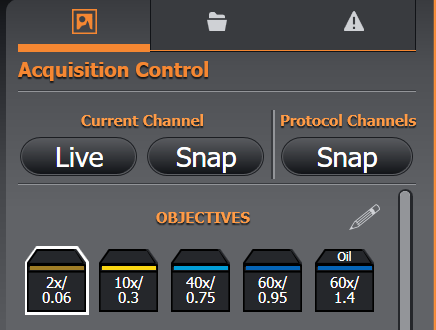
Part of imaging a sample starts with using the right objective for your needs. Typically the BC43 will be shipped and pre-configured with the objectives you purchased with the main unit. The configuration includes setting parfocality and parcentricity so that when you move between objectives the focus is retained and a feature of interest remains very close to or ideally in the centre of the field of view. However, there are two scenarios where you may need to alter the shipped objective configuration:
-
You purchase a new objective and wish to add it to an empty position
-
You have more objectives than the five available spaces in the objective turret and you need to exchange them.
In both cases the first thing you need to do is edit a position which may either be empty or populated with an existing objective. To do this first select either an empty position or one which you sill swap out another objective for. e.g. the 2x objective in the example below:
Next you left mouse-click on the pencil (edit) icon. This will open up an editable dialogue box.
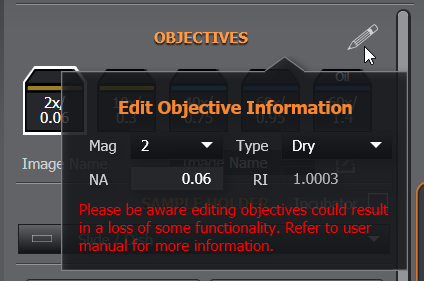
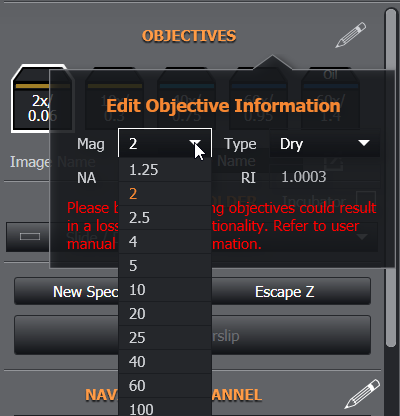
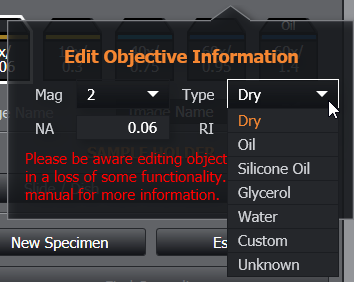
From here you can select from the drop down menus, magnification and whether the objective requires an immersion medium (e.g. mineral oil, silicone oil, water, or glycerol
You will need to enter the numerical aperture (NA) which can be found on the objective beneath the printed magnification. There should be no need to enter the refractive index (RI) as this should autopopulate when you select from Dry, oil (mineral), Silicone, etc. You may be working with a non-standard immersion media with a different refractive index to the defaults provided and so please select “custom” and manually enter a value. Entering the correct values for NA and RI later impact the optimal z-step size in 3D image capture and ClearView deconvolution results respectively.
If you had swapped the 2x objective for a 10x, then on exiting the edit dialogue you should now see
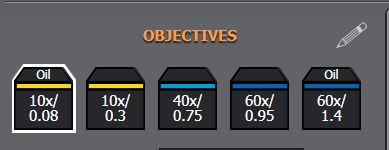
N.B. the example of the 10x oil with an NA of 0.08 is not a normal combination, but this example is used purely to demonstrate the swap clearly.
At this point you could use the exchanged objective to image, but it is unlikely to be in focus or be parcentric with other objectives if you intend to use others in the same session. It also may not work with Find Sample. In order to fully configure the new objective into the system you next need to set parcentricity and parfocality. Please follow the instructions here Parfocality and Parcentration Calibration