As described in the Image Mode and Feature Location section, device settings can be moved between Channel, Global, Image Mode and Advanced. Therefore, the settings described here may be found in a different location depending on the customisation / user of your Fusion installation. Note that some settings available will depend on the specific model of Sona camera present.
Channel Settings
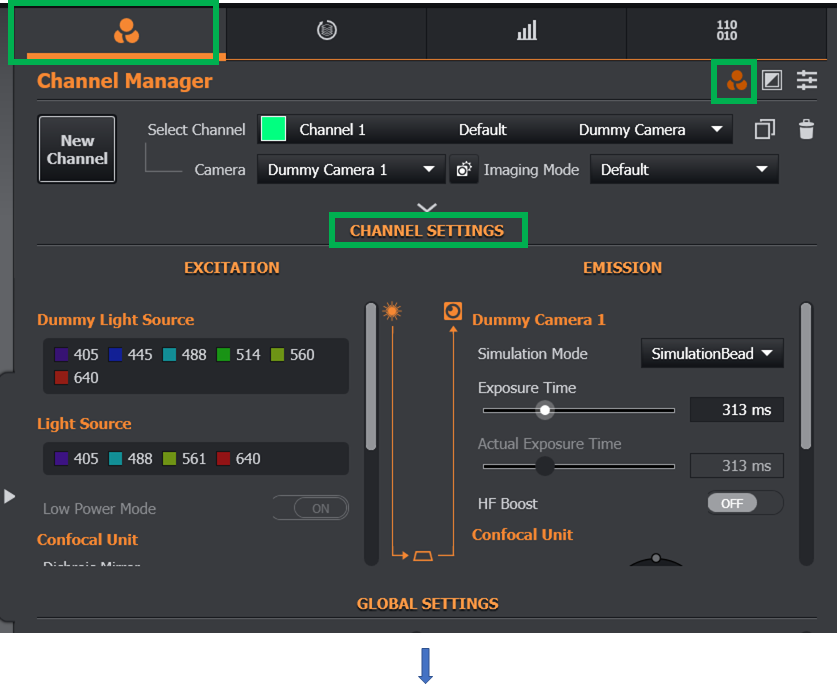
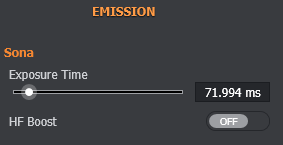
Exposure Time - this is the time that light will be collected on the sensor. Lower values will provide higher speed, but lower signal:noise / image quality / brightness / less total laser exposure to the sample. A starting value for this might be 100 ms.
HF Boost - see section HF Boost
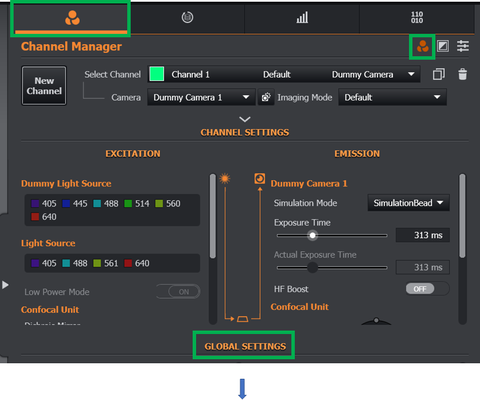
Global Settings
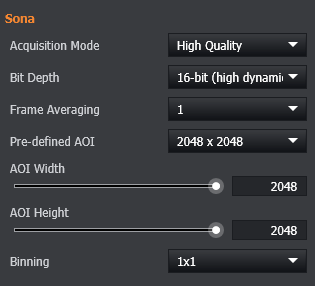
Acquisition Mode - (Default High Quality). This setting automatically adjusts some of the Advanced Settings of the camera, simplifying its operation. Options are High Quality or High Speed. High Quality is recommended for general use. High Speed should only be used with a Finite Burst Protocol. See also Advanced Acquisition Mode in the Advanced Settings (below).
Bit Depth - (Default for both Sona cameras is 16-bit HDR). Available options will depend on the model of Sona. Adjust the mode depending on the needs of your application for best results as described below:
Sona-6 series has three options:
-
12-bit (low noise) The 12-bit (low noise) mode is optimised for challenging low light applications where the noise floor sets the limit of detection. Therefore as sensitivity is best in this mode, 12-bit (low noise) mode is recommended for low light imaging e.g. confocal as shorter exposures can be run than HDR mode for the same or better signal to noise ratio. It is still possible to achieve high frame rates for most applications despite this high sensitivity. The only limitation of this mode is that the dynamic range may not be sufficient for a small number of applications.
-
16-bit (HDR) For imaging where the dynamic range of the 12-bit (low noise) mode is exceeded, or a wide intrascene dynamic range is expected, the 16-bit (HDR) mode should then be used to avoid image saturation. This mode does not have the lowest noise floor, so it is always recommended to use the low noise mode when the best sensitivity is required.
-
11-bit (high speed) For the highest speeds the 11-bit (high speed) mode can be used. This mode is developed for the fastest possible imaging speeds., yet providing good noise characteristics. The data is 11-bit range but will be saved as a 12-bit file for compatibility.
The Sona-11 series have two modes:
-
12-bit (high speed) Using 12-bit High Speed mode may allow higher acquisition speeds, but will not reduce the size of the data as the image will be stored in a 16-bit file.
-
16-bit (HDR) For most cases, 16-bit HDR mode should be used as the sensitivity is the same as 12-bit mode, but dynamic range is greater. For faster speeds, use the 12-bit high speed mode.
It is important to note that selecting between 12 or 16-bit for either Sona model does not impact image quality in itself as the ADC of the camera has the same precision. The bit depth merely indicates the dynamic range that the camera may capture.
Frame Averaging - (Default 1) When set to values higher than 1, this will produce an image of the average of a number of frames. Its main purpose is to reduce spurious noise in the image. However, it would be better to increase the Exposure Time (unless this would lead to saturation of the image). Both options will decrease the speed, but increase the signal:noise / image quality / more total laser exposure to the sample.
Pre-defined AOI - (Default - full chip size) Allows the selection of a smaller AOI (Area of Interest) for imaging. This will reduce the size of the image (both on-screen and in total data size); allow lower exposure times to be used. It will not affect the area of the sample being illuminated - only the area being imaged.
AOI Width / Height - (Default is full chip resolution) These settings allow the AOI to be adjusted by single pixels. See also the Pre-defined AOI (Global Settings, above)
Binning - (Default 1x1) Binning allows the image to be reduced in XY resolution by combining (binning) pixels on the camera chip. Increasing values will lead to lower resolution images, smaller data sizes and allow shorter exposure times to be used. Binning will also increase the signal:noise of the image (but only by a factor of the binning used - for example, 2x2 binning will only increase the signal:noise by a factor of two. On an EMCCD, this would be a factor of four). Fusion will automatically adjust the exposure time to maintain the image intensity. See Scale Exposure with Binning option in the Advanced Settings section (below).
Advanced Settings

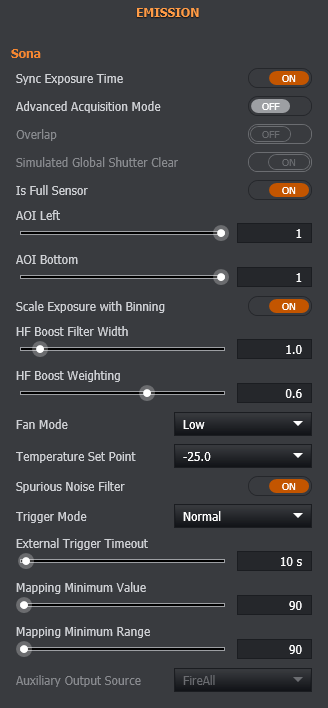
Sync Exposure Time - (Default ON) When used with a confocal system, such as the Andor Dragonfly, this option will set the exposure time to match the image scanning speed (based on the rotation of the spinning disk). Assuming a default rotation speed of 6000 rpm on Dragonfly, this will cause the exposure time to be rounded to the nearest 2.5 ms. Switching this setting off may lead to image artefacts and/or scan lines.
Advanced Acquisition Mode - (Default OFF). When ON, this will disable the Acquisition Mode setting in the Global Settings (see above), but unlock the Overlap, Rolling Shutter Global Clear, Pixel Readout Rate and Auxiliary Output Source features (see below).
Overlap - (Default OFF) When enabled, the exposure time and readout will happen in parallel, increasing the speed of acquisition. Note that this feature is only used in a Finite Burst protocol. In all other cases, it will not be used.
Simulated Global Shutter Clear - (Default ON) When enabled, the exposure time is extended by the full readout time of the sensor. This ensures that all rows of the sensor are exposed for the duration of the user specified exposure time when in Rolling Shutter mode.
Is Full Sensor - (Default ON) This is linked / related to the Pre-defined AOI setting (see Global Settings section above) and the AOI settings (see below). When ON, it will reset the camera back to full chip mode.
AOI Left / Bottom - (Default is full chip resolution) These settings allow the AOI to be adjusted by single pixels. See also the Pre-defined AOI (Global Settings, above)
Scale Exposure with Binning - (Default ON) As described in the Global Settings section (see above), this will automatically adjust the exposure time when the binning is changed.
HF Boost Filter Width - See section HF Boost
HF Boost Weighting - See section HF Boost
Fan Mode - (Default ON (Full) This allows the cooling fan in the camera to be slowed / stopped. It is strongly advised not to adjust the default setting. Advanced users may want to change fan speed, but reducing fan speed may result in the sensor temperature increasing when used at higher frame rates. It is unlikely to damage the camera, but will result in an overheating alarm to be triggered, requiring the software to be restarted and leaving the camera to cool before restarting. Alternatively, water cooling may be used for applications that are sensitive to vibration. Note the guidelines for temperature set point as this depends on the application.
Temperature Set Point - (Sona-11, default 15.0°C, Sona-6, default -25°C) This allows the camera's target cooling temperature to be changed. There should normally be no reason to adjust from the default settings. However, for advanced users the guidelines are as follows:
-
Long exposures: Lower temperatures will result in lower dark current noise, which can be useful for weak signals at extended exposure times (e.g. 1 second or more) as dark current becomes the dominant noise source.
-
Short Exposures: For very short exposures, a higher sensor temperature is recommended for best performance (Sona-11, 15.0°C, Sona-6, default 0°C). Running a sensor at high speeds results in higher heat outputs, therefore the camera needs to dissipate this to maintain the sensor temperature over sustained times. There is no benefit to using deeper cooling for sCMOS cameras at short exposures as dark current is negligible.
Spurious Noise Filter - (Default ON). This setting should be enabled. It reduces the random noise that can sometimes be seen with sCMOS sensors.
Trigger Mode - (Default NORMAL). This is an advanced feature that allows the camera's Ext Trigger input pin / cable to either Start an acquisition, or take a single Exposure.
External Trigger Timeout - (Default 10 seconds). Related to the Trigger Mode, this is the length of time the software will allow before producing an error message if it does not receive a trigger on the camera's Ext Trigger pin / cable.
Mapping Minimum Value - (Default - depends on the camera). Related to the Mapping of the image. This sets a minimum value that is allowed when using the mapping tools to control the on-screen brightness. It has no effect on the raw data / intensity of the image.
Mapping Minimum Range - (Default - depends on the camera). Related to the Mapping of the image. This sets a minimum range that is allowed when using the mapping tools to control the on-screen brightness. It has no effect on the raw data / intensity of the image.
Auxiliary Output Source - (Default - FireAll). As described above, this option will be greyed out and controlled by the Acquisition Mode setting, unless Advanced Acquisition Mode is enabled. This controls the behaviour of the Aux Out 1 pin / cable. On a Dragonfly confocal system, this is used to synchronise the excitation lasers by means of Active Blanking. If the wrong option is selected, image artefacts may result. See also Finite Burst Protocols.