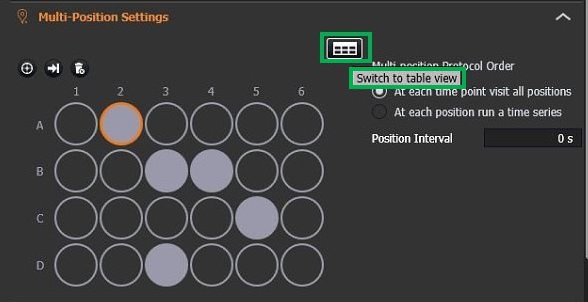
Navigation in Well-Plate View
1. If calibration was previously done, then by selecting the Multi-Well plate and protocol type (Multi-Position or Multi-Position no Z), you will view the well plate on the user interface.
- The user can work using the well plate interface.
- By clicking on the table (highlighted in green), the user can go toNavigation in Table View.
2. If the user is using a protocol with selected positions for another Multi-Well type, a warning will appear.
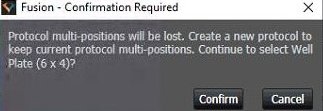
- To keep previously selected positions, a new protocol must be created before selecting the new well plate type.
- If there is no need to keep the positions, the user can select the new well plate type and add new positions. Old positions and well plate type will be overwritten.
3. If recalibration of the well plate is needed the user should click on the icon highlighted in green.
- For an explanation on how to calibrate the well plate please go to Starting with Multi-Well.
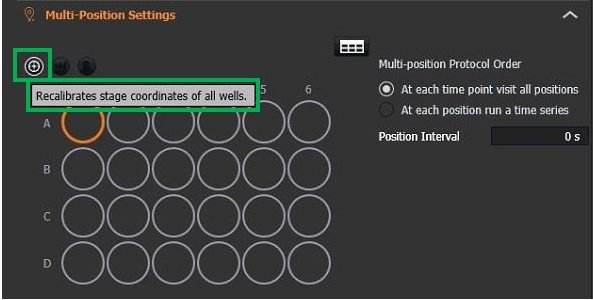
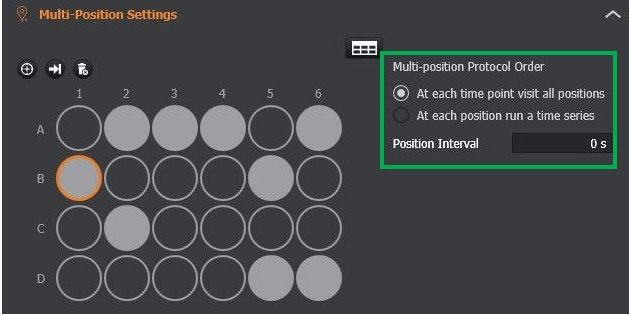
4. The wells present different colour codes:
- Orange circle - the well the user is currently in.
- White circle - well number.
- Full grey circle - well selected for acquisition.

5. Select the wells for acquisition
- Toggle between navigation and selection.
- Add treatment → selection mode. The user can select wells.
- Confirm treatment → navigation mode. The user can navigate through the wells.
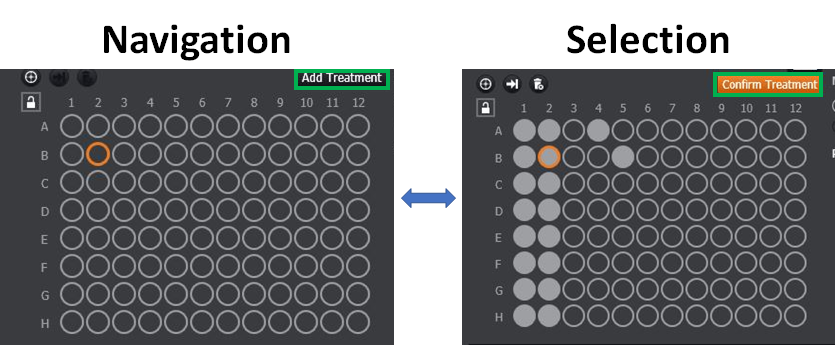
- Click on add treatment to allow selection mode.
- Select the wells - hold mouse left click and select rows /column.

- Select all the plate or independent areas of acquisition.
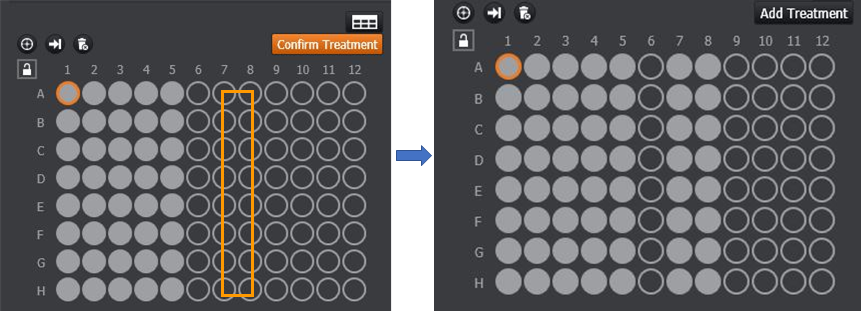
- point click to select specific wells
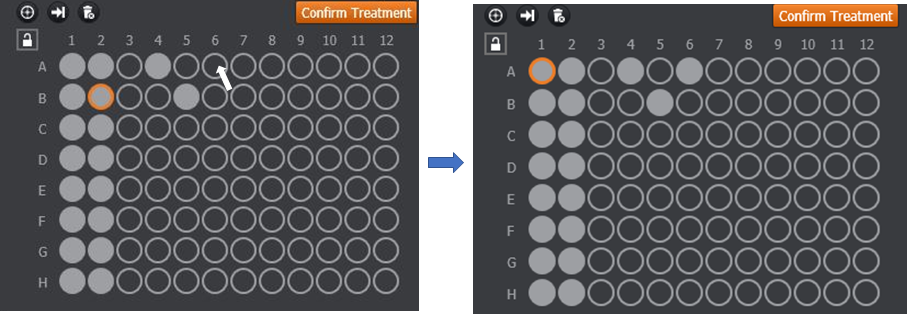
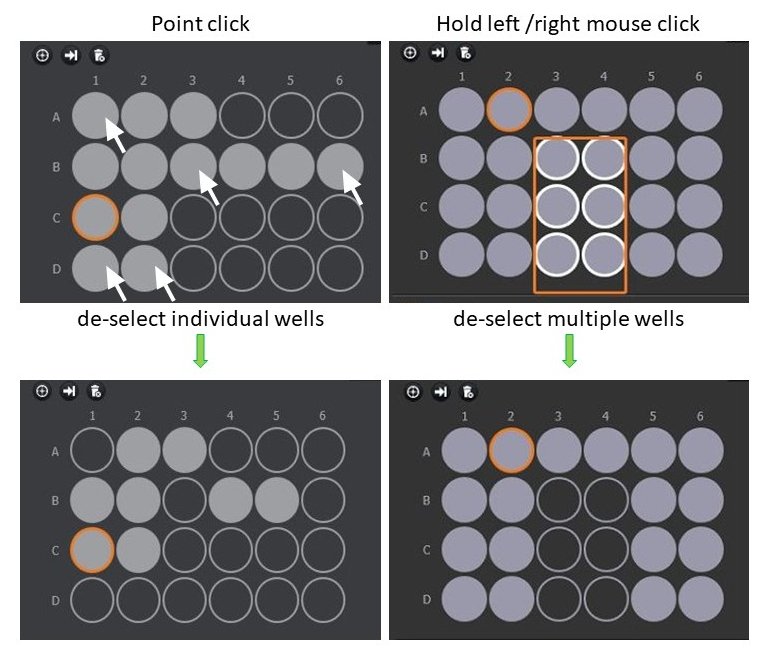
6. If needed de-select some of the previously selected wells
- Point click with the mouse - de-select individual wells.
- Hold left/right mouse click - de-select multiple wells.
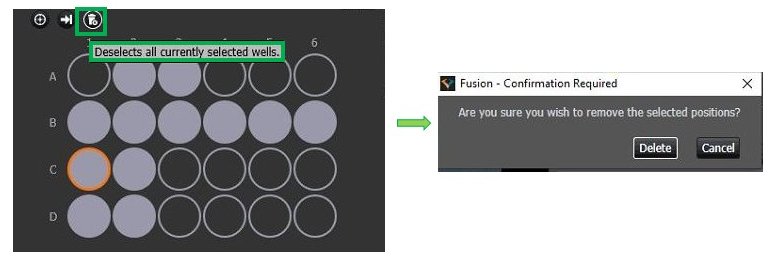
- To de-select all the wells, click on the icon highlighted in green.
- A warning for confirmation will appear.
- Click delete - well selection is deleted.
- Click cancel - well selection is maintained.
7.Navigation Mode
- Toggle between navigation and selection.
- Add treatment → selection mode. The user can select wells.
- Confirm treatment → navigation mode. The user can navigate through the wells.

- Click Confirm treatment to enter navigation mode.
Click on the icon highlighted in green and move to the next selected well.
- The stage will move according to the order of selection.
- See example - well selection order 1→ 2→ 3
- If the user requires a specific order of navigation, that order should be used to select the wells.
- The order of well selection is the order that will be used for acquisition.
- To update the order of well navigation/acquisition, it can be done in table view mode ( go to navigation in table view).

8. Select the protocol order (highlighted in green). The user can choose between the different options:
- At each time point visit all positions.
- At each position run a time series.
- Select a time interval for acquisition between wells.
- If position interval is zero, the acquisitions will run continuously (no interval between wells).
- An interval between 0-60 sec can be chosen for acquisition between wells.
9. Extra information for 96 Well plates
- After calibration, the external rows and columns are locked.
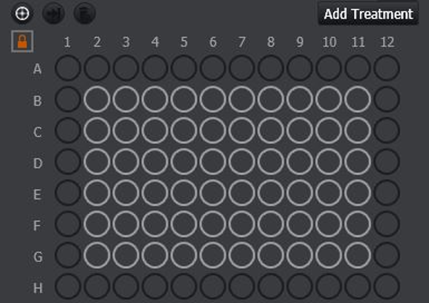
- User can access acquire on all the well plates.
- A warning will appear since at high magnifications there is a potential objective crash hazard.
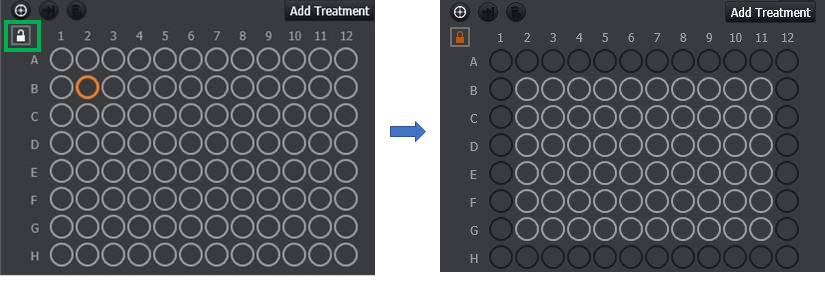
- To use all 96 well plates
- Click on the padlock icon.
- A warning will appear.
- Confirm that you want to navigate to outer wells.
- All the wells will be accessible for acquisition.

- To lock outer wells → click on the open padlock icon.
10. The user can now run a protocol.
- The selected well positions have to be combined with the acquisition channels (see adding channels to a protocol).
- Multi-Well positions can also be combined with other protocols feature such as Time Series, Z Scan, Montage, Drift Stabilization settings, Image Processing and loop options.
- Go toCreating a Protocol to have more information on the specific protocol type you want to combine with the Multi-Well positions.
11. Go to Navigation in Table View for:
- more information on the selected positions,
- modify a specific position,
- modify the acquisition order,
- navigate to any of the listed field positions
- delete any of the listed field positions
Click on the table highlighted in green to move to table view.
