The Acquisition Control tab is organised into the following sections:
Acquisition
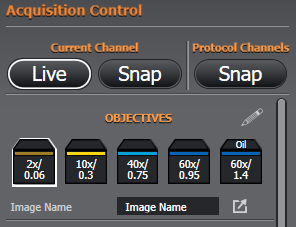
Current Channel - Live & Snap
This the current settings to provide a real time live view or snap shot of the current channel.
Protocol Channels - Snap
Take a snap-shot using the channels from the current protocol.
Objectives
Switch between objectives. The values displayed for each objective are magnification and numerical aperture. Hovering over an objective will display a tooltip with further information. When switching to or from an oil objective, Fusion will prompt you you add or remove oil from the objective. For more information see Oil Objectives.
If any of the hardware objectives are switched, the objective information can be editing by click the pencil icon.
Image Name
You can specify the name of any acquired images here. Clicking the 
Sample holder
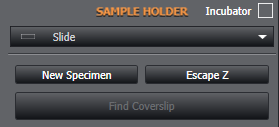
SAMPLE HOLDER: This allows you to select the sample holder type you are currently using. If using an Incubator, this can be specified by enabling the Incubator checkbox. This will apply an offset to any movement in Z, which can be specified in Hardware preferences
New Specimen: This button will clear any previously set navigation bounds and escape the current objective. This is designed to quickly help you after load a new sample.
Escape Z: This will escape the current objective. Once the objective is escaped, this button will then allow you to refocus the objective.
Find Coverslip: This will attempt to automatically locate the coverslip in the Z plane. For further information and a list of supported objectives, Specimen Navigation
Sample Navigation
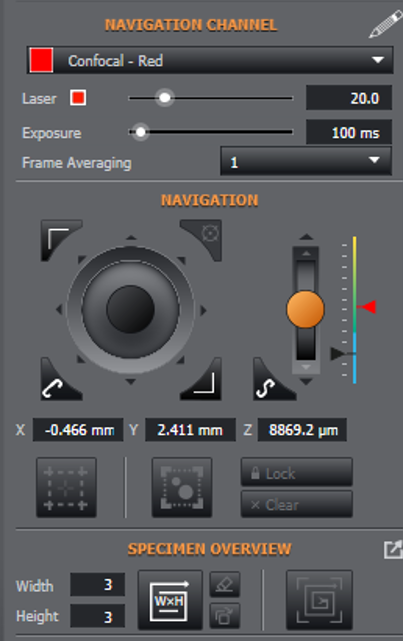
NAVIGATION CHANNEL: dropdown to select the desired Navigation Channel – it does not have to be a Protocol Channel, but it makes sense to use one of those! For Live imaging and setup we recommend using the longest wavelength for minimal photo-toxicity. You can quickly adjust the exposure time & Laser/LED power of the navigation channel here.
Clicking the pencil icon will allow you to edit the name and lookup table of the channels. See Channels

NAVIGATION: The joystick on the left hand side provides control of the XY stage, while the arrows around the control provide large and small nudge movement in eight directions. The triangular button on the bottom left of the control allows you to switch movement between Coarse, Fine and Superfine.
The triangular buttons at the top-left and bottom-right of the joystick allow you to set the top-left and bottom-right boundaries respectively. See Specimen Navigation for more detail.
The rocker and heatmap slider on the right hand side allow control of the Z stage. The rocker speed can also be toggled between Coarse, Fine and Superfine. It also provides small and large nudge movements in both directions.
The heatmap allows more direct control of the Z stage by clicking and dragging the black slider. The heatmap is designed to give an imprecise overview of when the sample is likely to be in focus.
|
Yellow |
Unlikely to be in focus |
|
|
Green |
Likely to be in focus |
|
|
Blue |
Most likely to be in Focus |
The red slider is used to set the maximum position that can be navigated in Z. This is used to reduce the likelihood of crashing your objective into the stage.
For a more details breakdown of stage navigation using the joystick and rocker, please see Specimen Navigation


This feature is most useful with high mag or large montage images. Defining bounds around your sample will prevent you moving away from the same or losing it in the field of view.

SPECIMEN OVERVIEW
This tool can be used in two ways:
-
To simply capture a large overview of your sample, which is presumably bigger than the field of view of the objective you have chosen to use. You specify how many fields in X (width) and Y (height) you wish to extend your image capture over and then start the overview with the Quick WxH Montage tool. You can then use the resulting image to navigate/inspect your sample activating the Click to Navigate tool and clicking anywhere of interest in the image to bring it into the objective field.
You can also use this in conjunction with the Multi-Position Settings Protocol element
a) to set multiple positions of interest in a multi-position experiment.
b) as for (a) but just as a means to register positions you wish to inspect later at higher magnification
2. If you already set a bounded region, you can create a specimen overview, typically at a higher magnification, using Quick Bounded Montage tool .

Clear the overview: Saving image to Gallery

Show the current overview


Note: Further montage options can be defined using a Montage
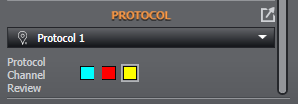
Protocol
The protocol section of the panel provides a dropdown list of all defined protocols, allowing you to easily switch between them. The channels for the selected protocol are also displayed, allowing you to quickly review them.
Run Protocol
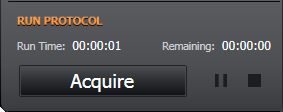
Click Acquire to start the acquisition. Pause and stop controls may be used to pause or stop an acquisition in progress. The Run Time for the protocol and the time Remaining until the protocol is complete is also displayed.
Note: If a protocol has not been configured and selected, Define a protocol is displayed in place of Acquire. Clicking the link will take you to the Protocol Manager to enter the required protocol settings.
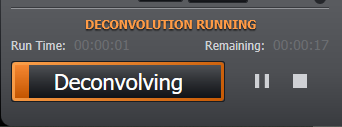
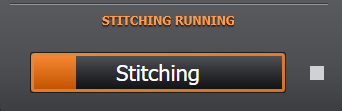
Deconvolution / Stitching progress
If a deconvolution or stitching operation is running, the Run Protocol area will display the progress of the deconvolution/stitching operation.