Protocol Manager enables you to create, modify and manage protocols.
Overview
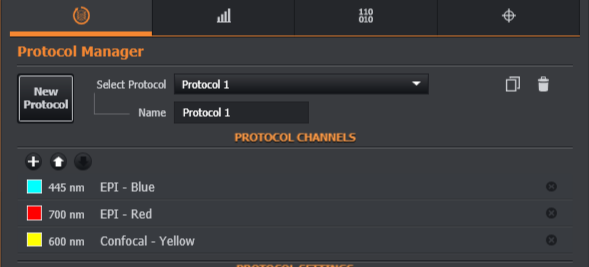
New protocol: Create a new protocol.
Select Protocol: Select an existing protocol.
Name: Displays the name of the current protocol. When creating a new protocol the default name can be changed as required.
Copy Protocol: Creates a new protocol by copying the currently selected one.
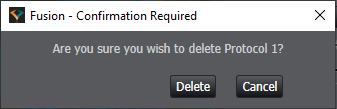
Delete Protocol: Delete the currently selected protocol. You will be prompted before deletion.
Protocol Channels
-
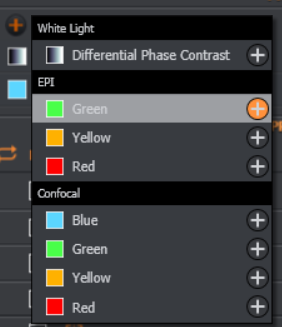
Use the
add button to add an additional channel to the protocol. The available channels will be displayed.
-
Highlight a channel in the list and use the move up and move down buttons to change the order of the channels.
-
Use
remove to remove the selected channel from the current protocol.
Protocol Settings
This section describes the various protocol settings within Fusion. These can be enabled by ticking the checkbox on the left hand side of each element.
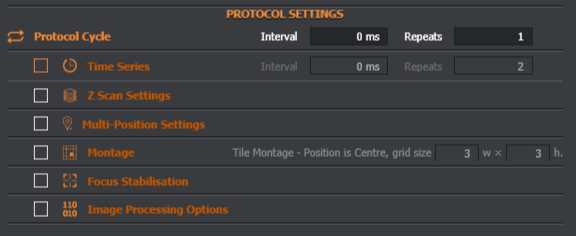
Protocol Cycle
Here you can specify how many times to cycle through the entire protocol and the interval between these cycles.
Time Series
Define a simple time series with options to control the interval and number of repeats.
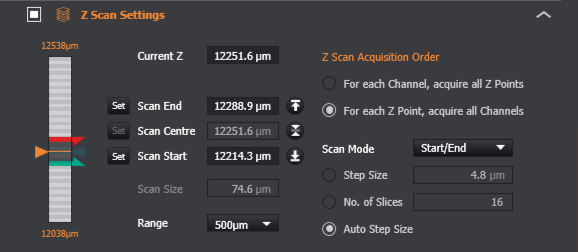
Z Scan
You can define the scan depth using the sliders or by inputting a specified range.
Set the Z Scan acquisition order and the Scan Mode (Start/End or Centre/Size).
Step size and number of slices can be defined manually or auto step size can be used. Auto step size will use the Nyquist formula to calculate optimal sample depth.
Multi-Position Settings
Multiple positions to scan are added by clicking on the + icon.
Positions can be re-ordered for protocol execution or reviewed before the acquisition.
Quick automatic calculation of the fastest path through selected fields available by pressing 'Optimise Path'.
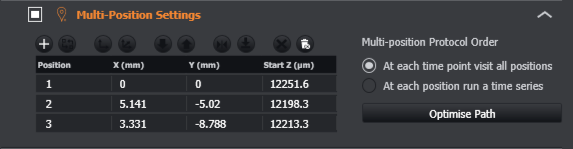
If montage is enabled (see below), the protocol will run the specified montage at each position.
Montage
Images are acquired so that they overlap slightly, allowing a montage of the image to be created from a series of smaller images. This can be useful for capturing high resolution images of samples that are larger than the field of view.
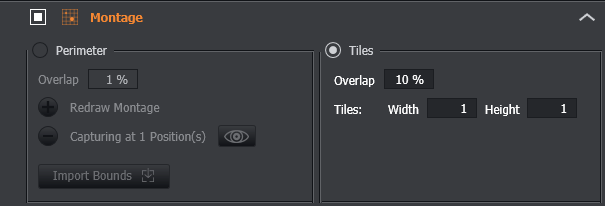
Tiles - When in Tiles montage mode, this defines the size of the montage as a number of overlapping fields.
Perimeter - When in Perimeter mode, you define positions and the montage size will be automatically calculated to include all the defined positions. Import bounds allows the top left and bottom right coordinates to be used from set bounds.
See Montage for more detail.
Focus Stabilisation
This will enable Focus Stabilisation on the protocol. For more information see Focus Stabilisation
Image Processing Options
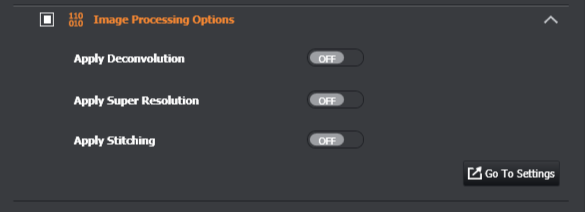
Apply Deconvolution - This will apply 3D deconvolution while still acquiring the image. You can specify when the deconvolution will be applied during the acquisition.
Apply Stitching - This will automatically stitch the image after acquisition. Only available if montage has been selected in the protocol.
Deconvolution can also be perform post acquisition using the Image Processing Tab
More information on deconvolution can be found here