Creating a Photostimulation Protocol
Once the photostimulation channels are setup and the Mosaic has been suitably calibrated, you can then proceed with how you want the Mosaic to perform as part of the overall imaging experiment within the Protocol Manager. The photostimulation action that is performed by Mosaic is done by defining the trigger actions for Mosaic under Trigger Settings.
-
For your imaging experiment, go to Protocol Manager and for the photostimulation part the protocol settings are set under Trigger Settings:
-
When defining the trigger actions for Mosaic, you need to define the following:
-
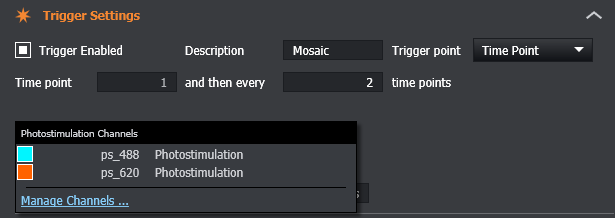
The trigger description
-
Set the timing of the photostimulation event using Time points and whether single, or at multiple time points (or manual trigger):
-
Time Point: (default) perform photostimulation at the set time point(s).
-
Manual trigger: manually initiate the photostimulation event. This can be useful in the case to monitor the condition of the sample and trigger photostimulation at the required time. The Photostimulation overlay can be moved to account for movement in the sample or different locations. Additional manual triggers can be fired during the time of the protocol – or the protocol stopped if the experiment reaches conclusion.
-
-
Photostimulation Channel Selection- this defines the illumination the specimen will receive during the photostimulation event. The photostimulation channels contain the illumination settings: wavelength intensity, power and other image channel settings).
-
The 'Device Action' set to Mosaic so that the Mosaic DMD array will be activated. For more further information on setting up the triggers, particularly on how to set when photostimulation triggers are applied, see the Triggering section on the Protocol Manager.
-
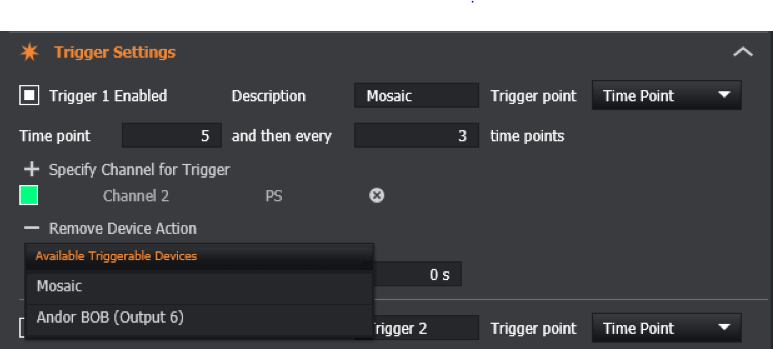
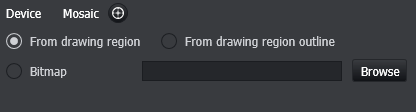
e. The device action - this sets where the photostimulation wavelengths will be applied to a region of interest set as photostimulation. These are referred to as photostimulation overlays. The options are as follows:
From Drawing Region - Illuminates the Mosaic array using the currently selected stimulation drawing region overlay(s). Refer to Overlays to get more information on defining drawing regions.
From Drawing Region Outline - Illuminates the Mosaic array using the outline of the currently selected stimulation drawing region overlay(s). Refer to Overlays to get more information on defining drawing regions.
Bitmap Illumination - Illuminates the mosaic array using a custom user generated bitmap (.bmp) image file as a source. The bitmap should be in a resolution of 800(w) x 600(h) pixels that matches the array of the Mosaic. Note that the image is flipped vertically. An easy way to check the orientation of your bitmap is correct is by loading the bitmap as the test pattern to visualise this.
Notes:
-
If you do not set at least set and select a photostimulation region, the protocol will not let you proceed.
-
Always check the region is set as a photostimulation region and not an analysis region, and that all regions you require for photostimulation are selected.
-
Note that it is not possible to set different trigger events to different regions - i.e. you cannot perform one wavelength and power at one region, and a different wavelength and power at a different region.
-
When using either 'From Drawing Region' or 'From Drawing Region Outline', all current Overlays with type 'Stimulation' are used to define the position of the Mosaic illumination(s).
-
Bitmap files are not converted into an overlay for stimulation and therefore will not generate a recorded region and be used for analysis of photostimulation data.
Example illuminations are shown below:
Using 'From Drawing Region' option, with and without 'Show Photostimulation Field' option selected:
Using 'From Drawing Region Outline' option, 'Show Photostimulation Field' option selected in both cases highlights the useable area for photostimulation:
Manual Triggering
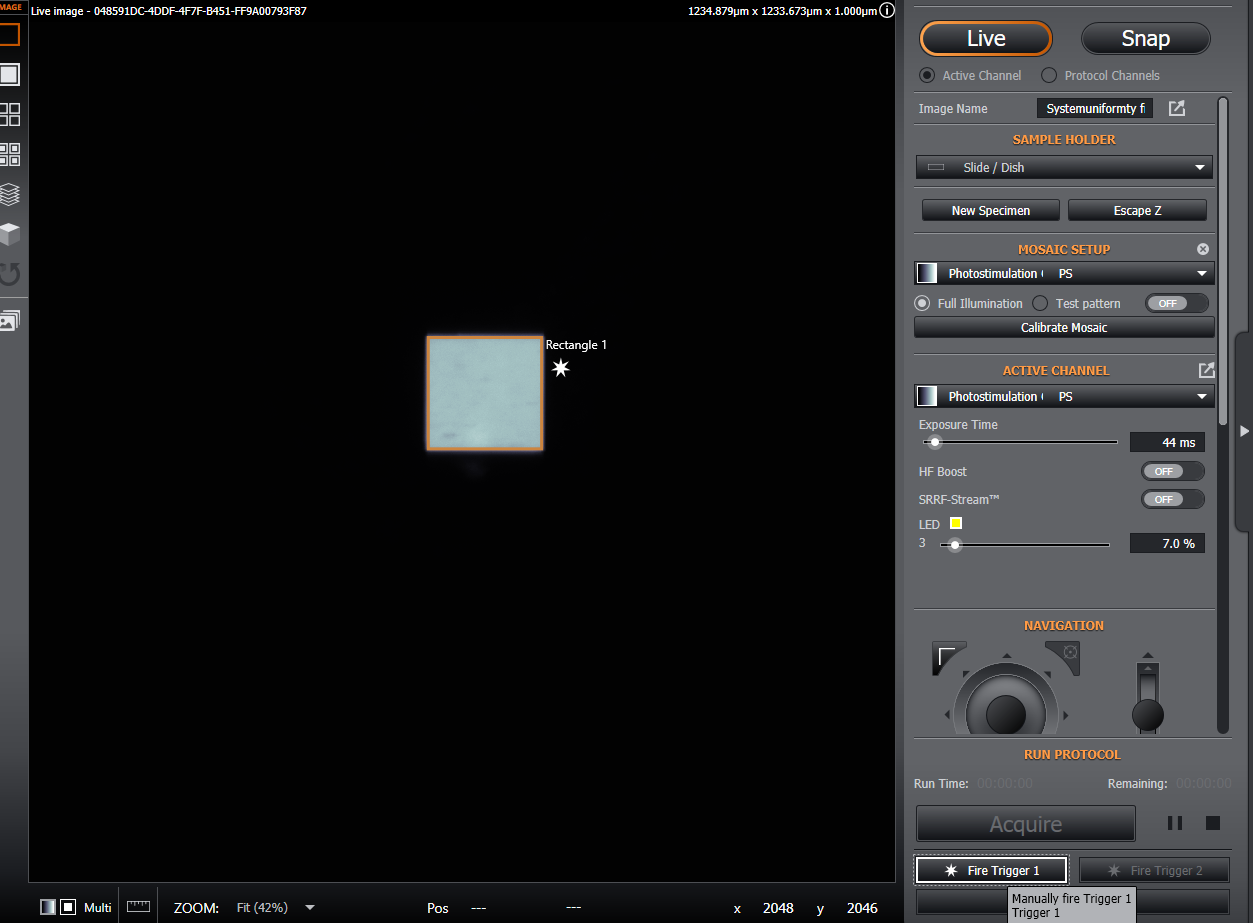
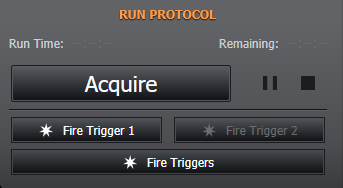
An additional option for Mosaic is that is also possible to manually perform photostimulation events. In order to manually trigger a photostimulation event, this can be set by setting the trigger for the Mosaic and associated photostimulation channel as a manual trigger action (as described in the previous paragraphs under section 2bii). If a trigger is enabled for the current protocol, the 'Fire Trigger' button(s) appear at the bottom of the remote panel. For more information, see Remote Panel.
Running a Protocol with Mosaic
Once the Protocol options are set as required, and the required Photostimulation Overlays have been added, the protocol may be run via the usual 'Acquire' button.
Note that Mosaic illuminations will not be seen on the Fusion display while a Protocol is in progress, as no images are captured during the period when Mosaic is illuminating.
Viewing Photostimulation Events Post Acquisition
When an image is acquired or loaded for which photostimulation events occurred during acquisition, event markers indicate when these events took place. These can be viewed in the Time Navigation bar. See Navigation Bar for more information. When the event marker toggle is selected, the position of the related Mosaic illumination(s) is also shown via 'Recorded Region' overlays. See Recorded Regions for more information.
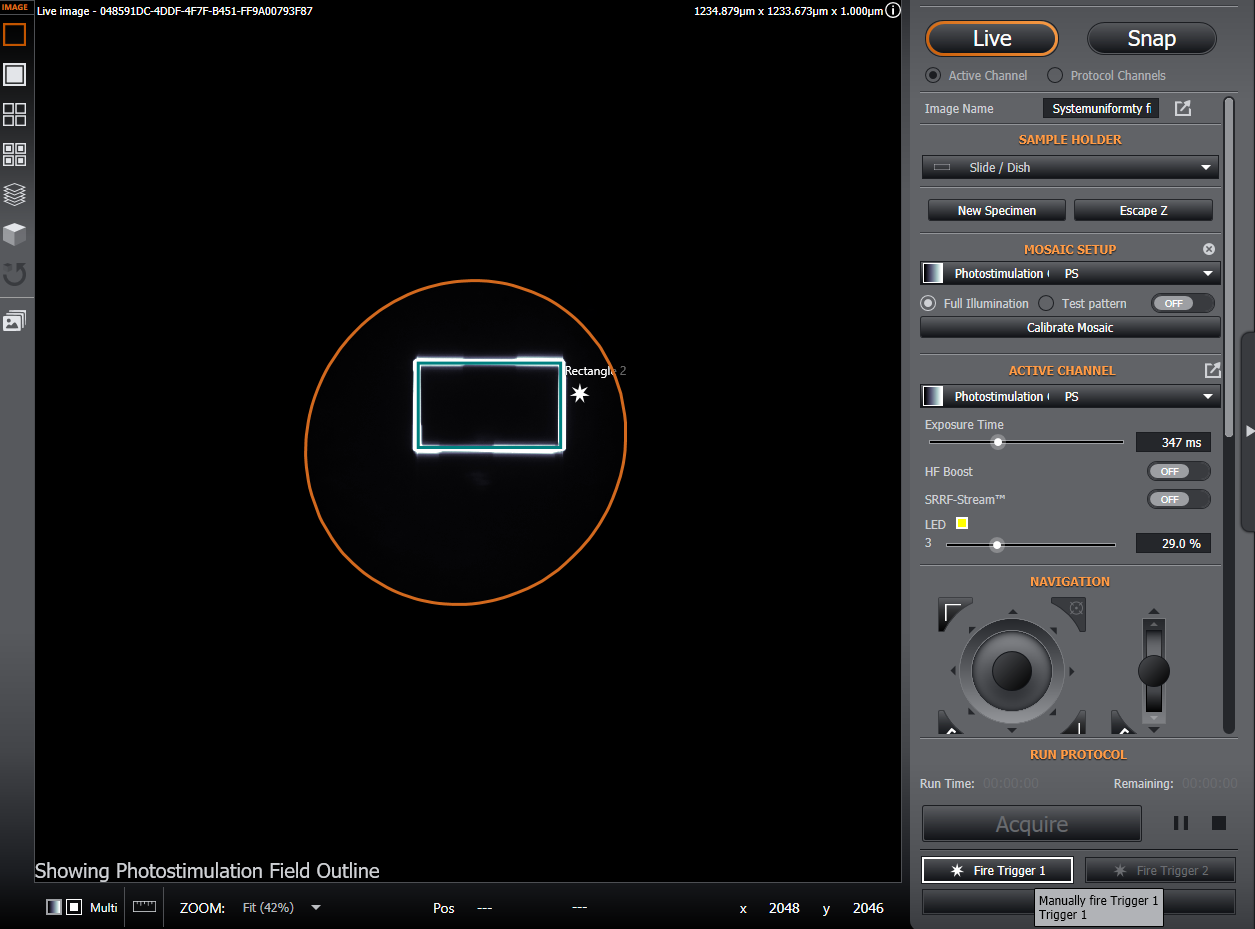
We can also fire a trigger to a selected region while in Live by selecting the required trigger to fire (it is possible to define up to 2 triggers). This can be a useful tool to perform photostimulation to observe events and their effect(s).
Note that the data will not be saved since it is not an acquisition as part of a protocol.
Please refer to our video tutorial outlined here for additional help: Photostimulation Imaging