Navigate to the Image processing tab by clicking the Expander Panel and then the Image Processing tab.
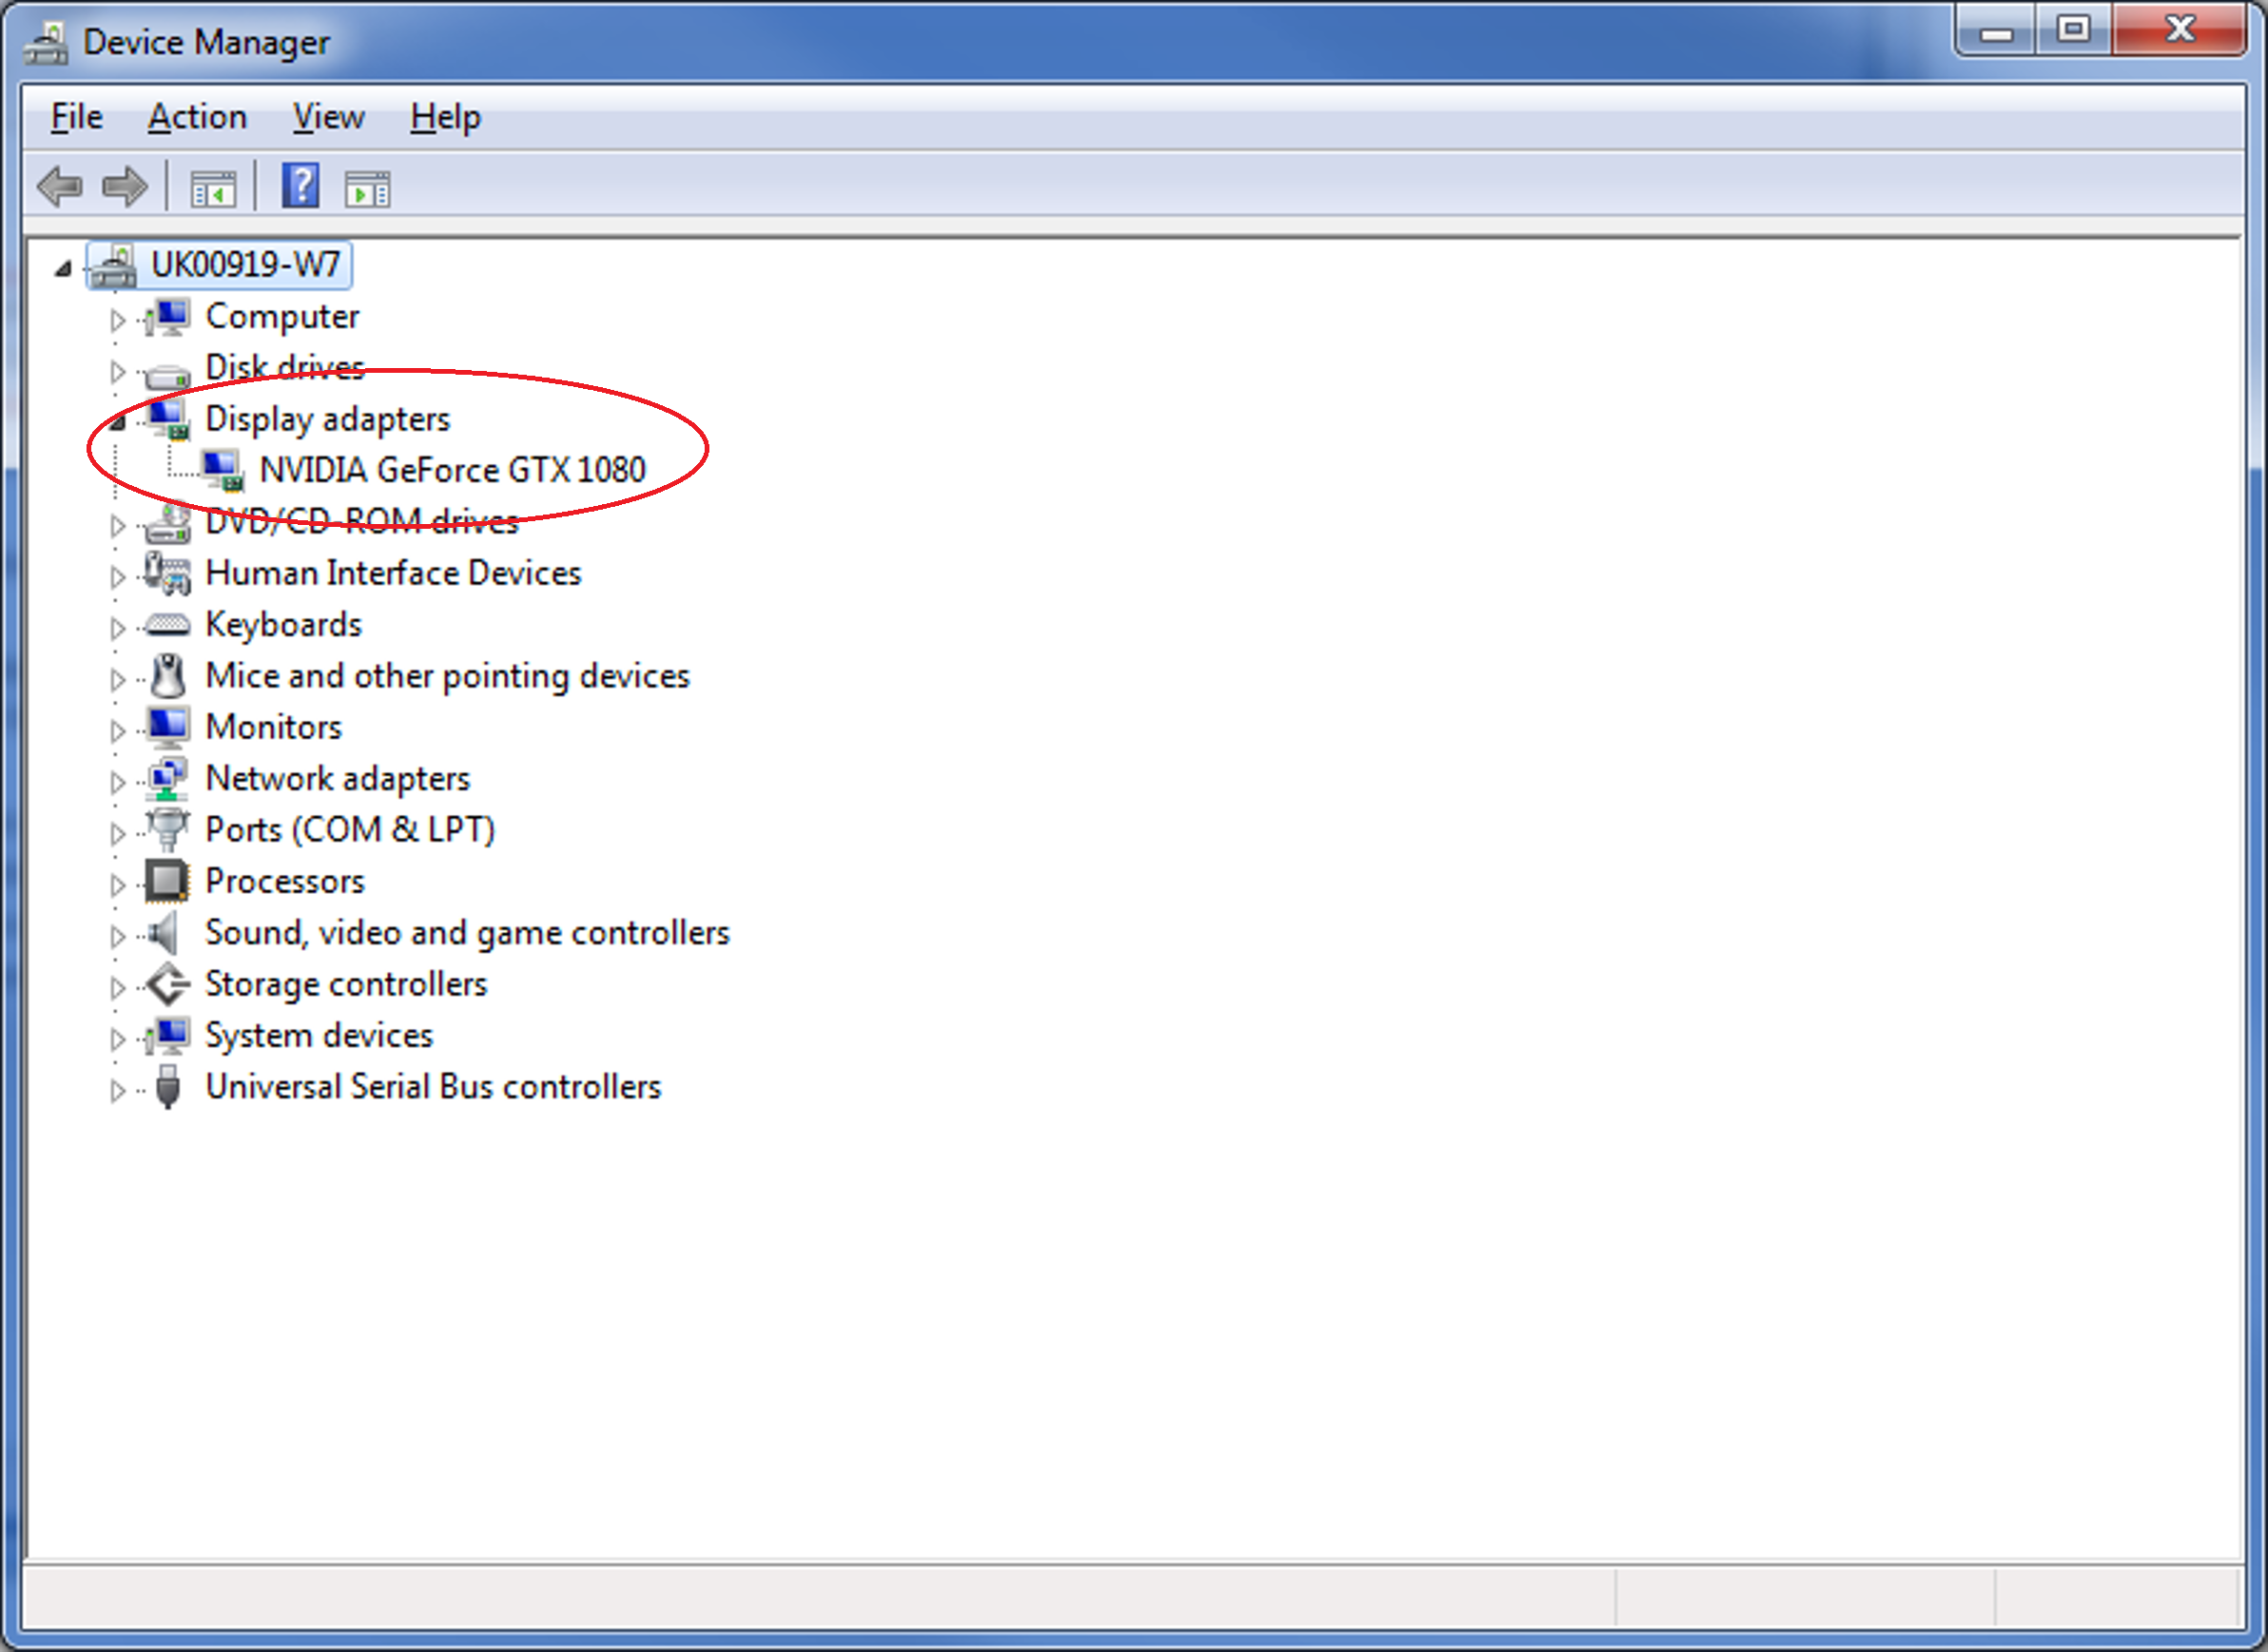
GPU (CUDA) Compatibility: Indicates if compatible GPU (CUDA) and drivers are found (green), or not found (red). In the screenshot above, a CUDA card is available. In some of the screenshots below, a CUDA card is not available, hence this will show red. Additional information as to why a system is not currently CUDA compatible can be found by hovering the mouse cursor over this feature. If this information indicates that a driver update is required, latest drivers can be downloaded directly from the nVidia website: (https://www.nvidia.com/download/index.aspx). To select the correct driver to download, the currently installed GPU card (if any) must be known. This can be found via the Windows 'Device Manager' tool. This can be opened by clicking the bottom-left Start button on your desktop, typing device manager in the search box and tapping Device Manager on the menu. The currently installed GPU(s) shall be listed under the 'Display adapters' option, i.e.:
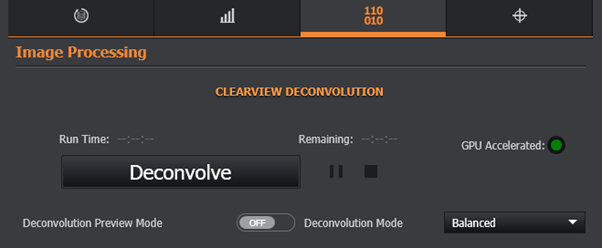
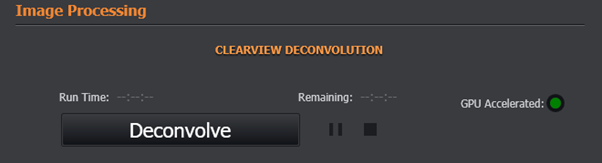
Deconvolve: Perform deconvolution on the image according to the specified options.
A video guide can be seen here: Image Processing Options- Deconvolution and Stitching
Preview
When enabled, an additional image window will appear with the deconvolved region shown at the same time as the original data.
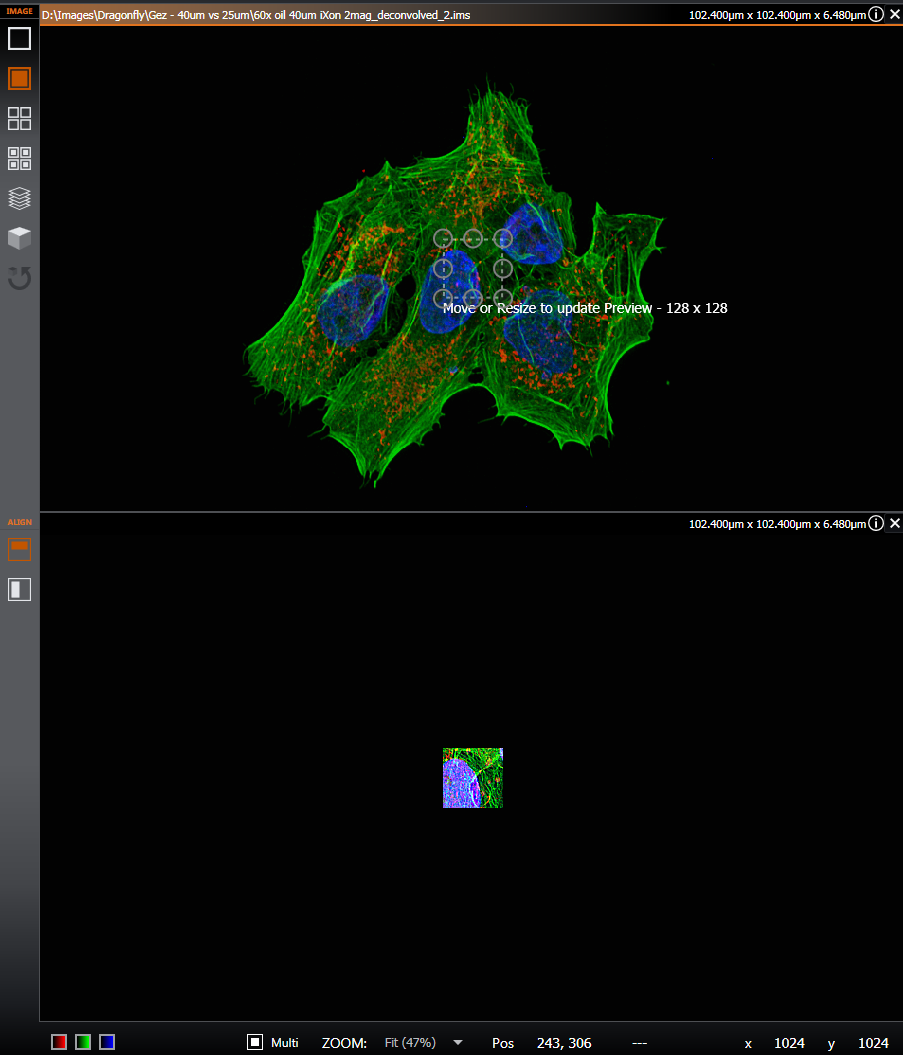
This option allows a section of the image to be rapidly deconvolved so that the effects of deconvolution can be seen before processing the entire image. This is great way of experimenting with the Processing options (see below).
The size and position of the data to be previewed in the Z dimension can be selected using the provided slider (when the number of Z-stacks in the image is greater than 2).
When the image window is in a 2D view mode, the size and position of the data to be previewed in the X and Y dimensions can be defined by moving or resizing the AOI (Area of Interest) that appears on the original data.
NOTE - the preview area is only shown in 2D and 2D MIP modes.
Deconvolution Mode

Deconvolution Mode a setting that determines the quality and duration of the deconvolution processing. The options are Fast, Balanced, and High Quality. These modes differ in their number of iterations such that more iterations are used from Fast to Balanced to High Quality. Many images will achieve satisfactory with the Fast and Balanced modes thereby reducing the total overall time required for the protocol.
If a CUDA compatible GPU (graphics processing unit) and drivers are available, the speed of deconvolution will be affected by the amount of memory available on the GPU. The GPU Processing Memory Limit can be set in the Rendering section of the Preferences.
To perform Deconvolution on the selected image:
-
Navigate to the Image processing tab by clicking the Expander Panel and then the Image Processing tab.
-
View and configure the Deconvolution settings as required. Refer to the section Image Processing Tab for further information.
-
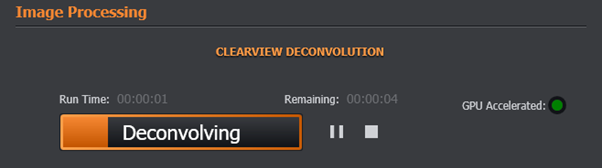
When the settings have been configured, Click the Deconvolve button to begin the process.
-
The elapsed run time and time remaining are displayed above the Deconvolve button.
-
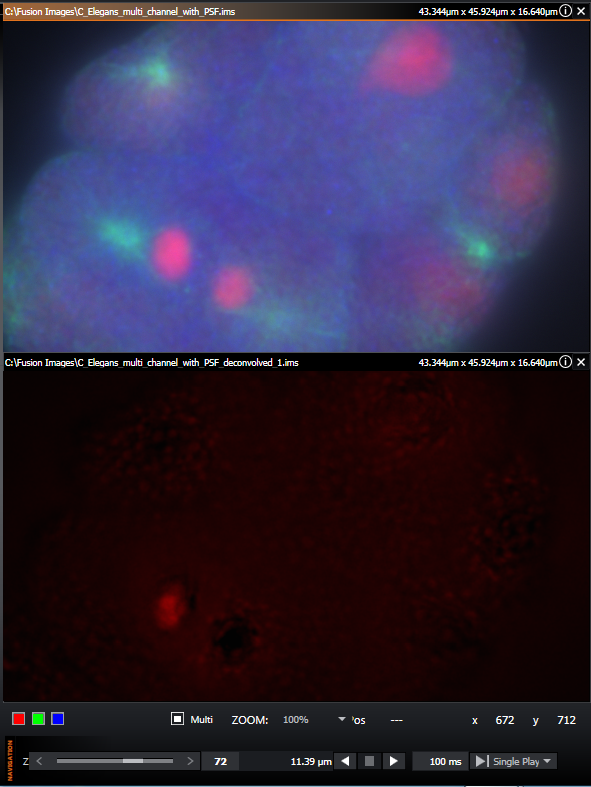
In the Image viewing window the original and deconvolved image as it is being processed are also displayed.
-
Once the processing is complete the original and processed imaged are updated and displayed.
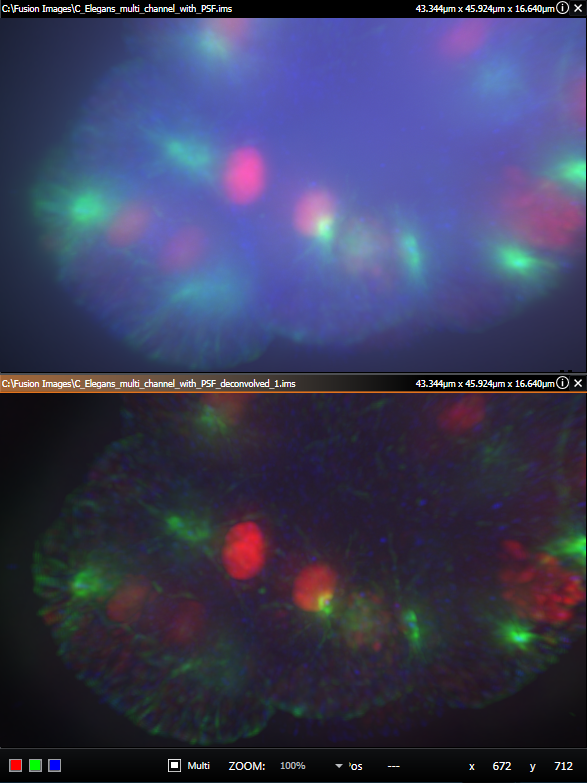
Above: the original image (top) and the deconvolved processed image (bottom).
A video guide can be seen here: Image acquisition: Acquire a Z scan (in Widefield) add Deconvolution