Contrast
Contrast Functions
The contrast functions allow you to modify how mapping is performed to render the current frame or view of the image.
| Auto Adjust Epi/Confocal | Performs a single "one off" adjustment of the image display based on the min and max values of the current image. | |
| Auto Adjust White Light | By clicking on the icon, the user will select the best mapping option for the image through steps of 1 to 10. |
| Always Auto Adjust | When enabled, this will automatically adjust the image display based on the min and max values each time the image is updated. |
| Manual Adjust | Manually set the image contrast. (Reviewed in the following section). |
Note that making these adjustments does not modify the image data- only how it is visualised and presented on screen.
Note also that the contrast information is stored in the image. This will be used by software that supports it - primarily Fusion and Imaris.
See also the File Manager Preferences for options on how to control when/how image changes are saved.
Manual Adjust
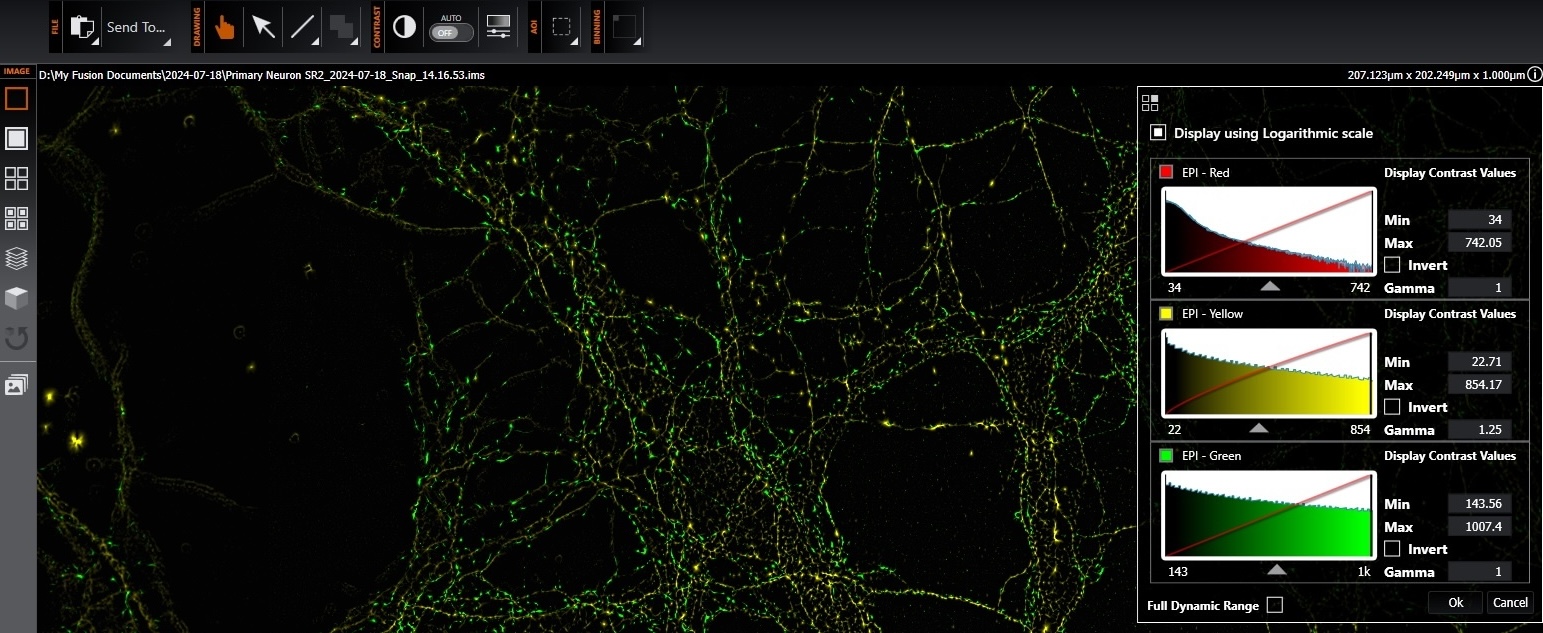
The Manual Contrast button opens the Image Contrast dialogue, which presents histogram(s) and tools for setting the Maximum and Minimum contrast values.

The contrast transfer function is shown as a red line overlaying the histogram plot. For multi-channel images one set of tools is provided per channel (the example above has 2 channels). Changing the Max and Min values or adjusting the linearity will modify the display in the Image Window. This may be used to improve contrast or view specific image features, normally with only small changes.

Above: Adjusting linearity may enhance how features appear on your display, Left, normal image, centre, increased linearity, Right, decreased linearity.
Note: The underlying image pixel intensities remain unchanged.
Using the Manual Contrast Dialog
- Set the Max and Min values in the image by typing a number into the edit boxes on the right of the dialog. Alternatively, you can click the left mouse button and drag to control the Min value (black level), while clicking the right mouse button and dragging controls the Max value (bright level). The image will be updated in real time.
- Increasing the value of the Linearity (dragging to the right) can help when there are both very bright and very dim areas that you would like to be able to see at the same time.
- Decreasing the value of the Linearity (dragging to the left) can help when there is a lot of unwanted background or you wish to reduce the contribution of the low intensity areas of the image.
To save changes click OK, or click Cancel to discard any changes.


